A Guide to Saltwater Tank Cycling
A new saltwater tank may look crystal clear but without beneficial bacteria it’s a toxic trap. Learn why cycling is critical before adding fish and how to do it right the first time.
Introduction: Why a "New Tank" Is a Dangerous Place for Fish
Saltwater tank cycling is the process of establishing beneficial bacteria in your aquarium that convert toxic fish waste into safer compounds—and it's the single most important step before adding any livestock to a new tank.
Quick Answer: How to Cycle a Saltwater Tank
- Set up your tank with saltwater, substrate, live or dry rock, and equipment
- Add an ammonia source (raw shrimp, fish food, or pure ammonia at 2-3 ppm)
- Introduce beneficial bacteria using bottled products or live rock
- Test water daily for ammonia, nitrite, and nitrate levels
- Wait 2-6 weeks until ammonia and nitrite read 0 ppm and nitrates are detectable
- Add livestock gradually starting with 1-2 hardy fish
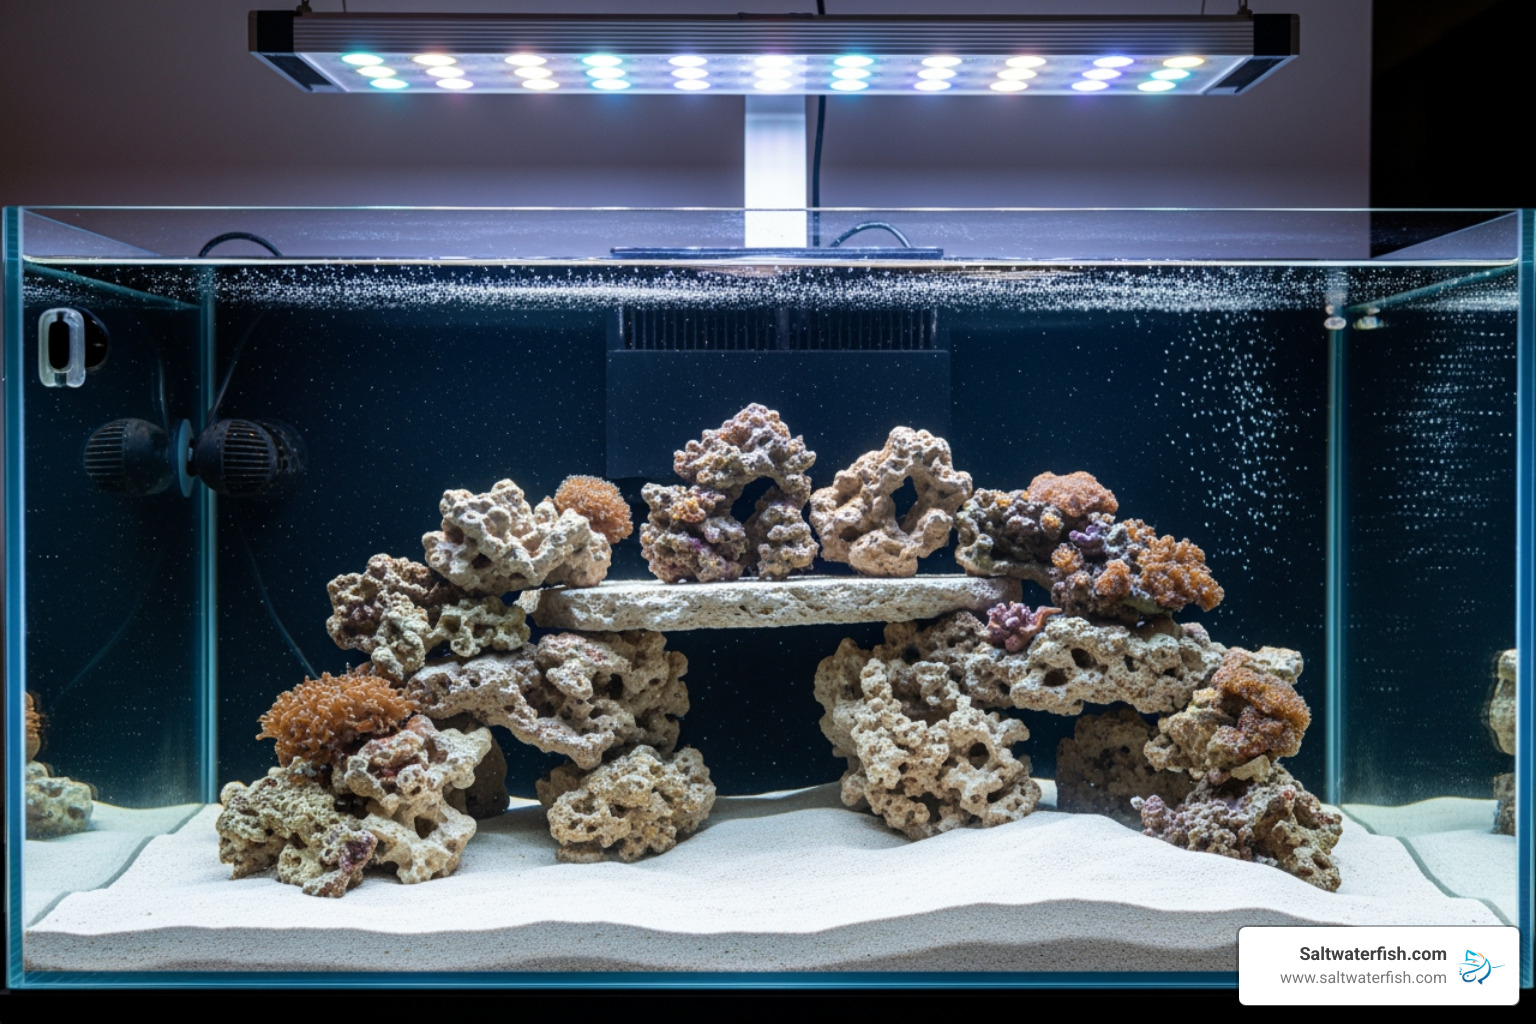
Here's the harsh truth: a brand-new aquarium looks pristine, but it's actually a death trap for fish. That crystal-clear water lacks the invisible biological filter—colonies of beneficial bacteria—that marine life depends on to survive. Without these microscopic workers, fish waste quickly becomes toxic ammonia that burns gills, suppresses immune systems, and kills livestock within days.
This is called New Tank Syndrome, and it's entirely preventable. When fish are introduced to an uncycled tank, they are swimming in their own waste. The ammonia concentration skyrockets, chemically burning their delicate gills and skin. You might notice them gasping for air at the surface, becoming lethargic, or showing red streaks on their fins and body. It's a painful, stressful, and often fatal experience that turns the dream of a beautiful aquarium into a nightmare.
Decades ago, hobbyists would sacrifice "hardy" fish like damsels to establish this bacterial colony—a practice that was both cruel and unnecessary. Today, we know better. Fishless cycling methods allow you to build a thriving ecosystem before any animals enter the picture, ensuring your fish arrive to a safe, stable home instead of a toxic experiment. These modern techniques are more precise, more humane, and give you complete control over the process. You can learn more about the specifics of various fishless cycling methods to find the one that best suits your setup.
The cycling process mimics nature's own waste management system: the nitrogen cycle. In established oceans and reefs, beneficial bacteria constantly convert ammonia (from fish waste) into nitrite, then into far less harmful nitrate. Your job is to cultivate these same bacterial colonies in your closed system before introducing livestock.
Patience is the single most valuable tool in saltwater fishkeeping. Rushing this process—adding fish too soon, skipping tests, or trying shortcuts—leads to dead animals, crashed tanks, and frustrated hobbyists who give up on the hobby entirely. But when you take the time to cycle properly, you're building a foundation that can support healthy fish and corals for years or even decades.
I'm Scott Hughes, and I've been working with marine aquariums and saltwater tank cycling for over two decades as the founder of SaltwaterFish.com, where we've helped thousands of hobbyists establish their first successful reef systems. The cycling process is where most new hobbyists either set themselves up for success or create months of headaches—so let's make sure you get it right the first time.
Understanding the Nitrogen Cycle: Your Tank's Life Support System
Before we dive into the "how-to," it's crucial to understand the "why." The nitrogen cycle is the invisible engine that drives a healthy aquarium, silently converting deadly waste products into less harmful substances. Think of it as your tank's life support system, constantly working to keep conditions stable for your marine inhabitants.
At its core, the nitrogen cycle relies on beneficial bacteria that colonize surfaces within your aquarium—your live rock, substrate, and filter media. These microscopic heroes break down waste, ensuring a balanced ecosystem. Without them, your tank would quickly become a toxic environment.
What is the Nitrogen Cycle and Why is it Essential?
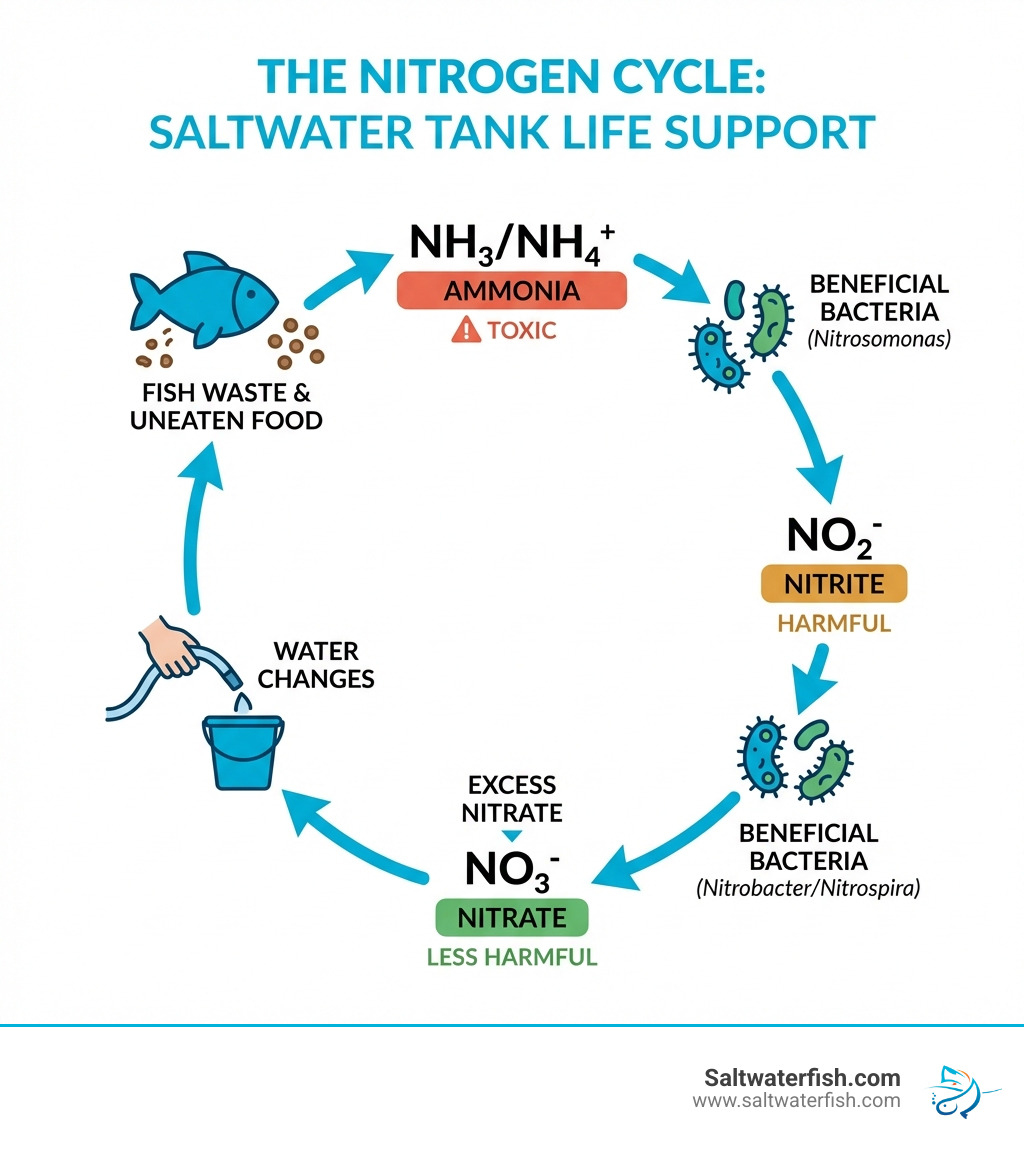
The nitrogen cycle is the fundamental process that prevents your aquarium from becoming a self-polluting death trap. In a closed system like an aquarium, fish waste, uneaten food, and decaying organic matter all break down to produce highly toxic ammonia (NH₃). Even in small doses, ammonia is a potent neurotoxin that damages fish tissues on contact. It burns their delicate gills, making it difficult for them to breathe, and can cause severe internal organ damage. Prolonged exposure, even at low levels, suppresses their immune system, making them vulnerable to diseases.
This is where our beneficial bacteria come in. The cycle begins with a group of bacteria, primarily Nitrosomonas, which consume ammonia and convert it into another toxic compound: nitrite (NO₂⁻). While slightly less toxic than ammonia, nitrite is still extremely dangerous to marine life. It enters the fish's bloodstream and oxidizes the iron in hemoglobin, turning it into methemoglobin. This process, known as "brown blood disease," renders the blood unable to transport oxygen, effectively causing the fish to suffocate even in oxygen-rich water.
Next, a second group of beneficial bacteria, mainly Nitrobacter, steps in. These bacteria consume the nitrite and convert it into nitrate (NO₃⁻). Nitrate is far less harmful to fish and invertebrates at low concentrations (typically below 20 ppm for reef tanks, though fish-only tanks can tolerate higher levels up to 40 ppm). While not as immediately lethal, high nitrate levels can still stress fish, encourage nuisance algae growth, and negatively impact corals.
So, why is this essential? Because it creates a livable environment. A "balanced nitrogen cycle" means we have enough beneficial bacteria to continuously break down waste products, neutralizing chemicals like ammonia and nitrites that can kill your fish. Without this biological filtration, your aquarium would be uninhabitable.
The Three Stages of the Cycle
The nitrogen cycle unfolds in three distinct, observable stages, each marked by the rise and fall of specific compounds:
- Ammonia Spike: Once an ammonia source is introduced (e.g., fish waste, decaying food), ammonia levels will begin to rise. This is the first sign that the cycle has begun. There are no beneficial bacteria yet to process it, so it accumulates. Your daily testing should show a steady increase in ammonia to a peak of around 2-3 ppm.
- Nitrite Spike: As the Nitrosomonas bacteria multiply and start consuming the ammonia, ammonia levels will begin to drop. Simultaneously, nitrite levels will start to rise dramatically, peaking as ammonia approaches zero. This indicates the first group of bacteria is established and working. This is often the longest phase of the cycle.
- Nitrate Accumulation: With Nitrosomonas diligently converting ammonia to nitrite, the Nitrobacter bacteria will begin to proliferate, consuming the nitrite. As nitrite levels fall back to zero, nitrate levels will start to accumulate. This is the final stage, signaling that both types of beneficial bacteria are well-established and the tank is nearing completion of its cycle. The presence of nitrates is a key sign of a mature biological filter.
Observing these spikes and falls is how we track the progress of our saltwater tank cycling. It's a natural, albeit sometimes slow, process that establishes the foundation for a thriving marine ecosystem.
A Step-by-Step Guide to Saltwater Tank Cycling
Now that we understand the science, let's get practical. Our goal is to kickstart and complete the nitrogen cycle in your new tank safely and efficiently using fishless cycling methods. This approach is humane, effective, and gives you far more control over the process.
Step 1: Gather Your Cycling Supplies
Before you begin, make sure you have everything you need. Having your supplies ready will prevent delays and ensure a smooth cycling process.
- Aquarium Setup: Your tank, stand, and canopy should be in place.
- Saltwater Mix: High-quality marine salt mix and RO/DI (Reverse Osmosis/Deionized) water. We need to mix the saltwater to the correct salinity (Specific Gravity of 1.024–1.026) and let it circulate and stabilize for at least 24 hours before beginning the cycle.
- Heater & Powerheads: A heater to maintain a stable temperature (around 78°F or 25.5°C) and powerheads for essential water circulation.
- Substrate: Live sand or dry sand. Live sand comes pre-seeded with some beneficial bacteria, which can give you a head start.
- Live Rock or Dry Rock: This will be the primary surface for beneficial bacteria to colonize. We'll discuss the differences below.
- Bottled Bacteria: Commercial bacterial supplements like Fritz-Zyme TurboStart 900, Dr. Tim's, MicroBacter7, or Prodibio BioDigest can significantly speed up the cycling process by introducing live nitrifying bacteria directly.
- Ammonia Source: This is crucial for feeding your nascent bacterial colonies. Options include pure household ammonia (without additives), raw decaying shrimp, or fish food.
- Test Kits: Accurate test kits for Ammonia, Nitrite, and Nitrate are non-negotiable. We recommend high-quality kits from brands like Salifert, Aquaforest, Red Sea, or Hanna. Avoid cheaper test strips for precise readings, though Aqueon 7-in-1 Aquarium Test Strips can give you a general idea of progression.
Step 2: Choose Your Cycling Method
There are several effective ways to cycle a saltwater tank, each with its own advantages. The best method for you will depend on your budget, patience, and desired timeline.
| Cycling Method | Pros | Cons | Best For |
|---|---|---|---|
| Live Rock | Already seeded with diverse bacteria and microfauna; can significantly shorten cycle time. | Can introduce unwanted pests (like Aiptasia anemones, bristle worms) and nuisance algae; higher initial cost. | Hobbyists wanting the most natural and potentially fastest cycle, who are prepared to deal with potential hitchhikers. |
| Dry Rock & Bottled Bacteria | Sterile and pest-free; gives you full control over what enters your tank; more affordable. | Requires adding a bacterial source; can take longer than live rock if bacteria aren't robust. | The modern, recommended method for most beginners, offering a clean slate and predictable results. |
| "Ghost Feeding" (Fish Food/Shrimp) | Simple and uses readily available materials (fish food or a raw shrimp). | Can be messy; hard to control the exact ammonia level; decaying matter can cause other issues. | A budget-friendly, low-tech approach, but requires more patience and can be less precise. |
Step 3: Introduce an Ammonia Source and Bacteria
With your tank set up, it's time to start the cycle by adding your chosen bacteria and giving them a food source: ammonia. This is the fuel that will grow your biological filter.
- If using Live Rock: Your rock already contains bacteria, so you just need to add an ammonia source to feed them.
- If using Dry Rock: This is a two-part process. First, add your bottled bacteria product according to the manufacturer's instructions. Products like Fritz-Zyme TurboStart 900 are highly concentrated and can be added directly to the water. Then, immediately add your ammonia source.
Now, choose your ammonia source to bring the level up to 2-3 ppm (parts per million).
- Pure Ammonia: This is the most precise method. Use pure ammonium chloride or a household ammonia product that contains only ammonia and water (no surfactants, perfumes, or dyes). Shake the bottle—if it foams, don't use it. You'll need to calculate the correct dosage for your tank volume. To make it easy, you can use an Ammonia Cycling Calculator to determine the exact amount to add.
- Raw Shrimp: A classic method. Place one or two small raw shrimp (from the grocery store) in a media bag and drop it into your tank. As the shrimp decays, it will slowly release ammonia. This method is less precise but very effective. Remove the shrimp once you see nitrates appearing.
- Fish Food: A simple but less controlled method. Sprinkle a small pinch of fish flakes or pellets into the tank every day. The decaying food will produce ammonia. The downside is that it can be messy and difficult to gauge how much ammonia is being produced.
Step 4: Test, Track, and Let the Bacteria Do the Work
Once ammonia and beneficial bacteria are in the tank, the hardest part begins: waiting.
At this stage, your job is not to “fix” the tank—it’s to observe and measure. Test your water daily (or every other day) for ammonia, nitrite, and nitrate using reliable test kits. Write the results down or log them digitally so you can see trends over time.
Here’s what a normal cycle looks like:
- Days 1–7: Ammonia rises to around 2–3 ppm and stays elevated.
- Days 7–21: Ammonia begins to drop as nitrite spikes sharply.
- Days 14–35: Nitrite falls back to zero while nitrate steadily increases.
During this period, resist the urge to intervene. Do not add fish. Do not perform water changes unless ammonia exceeds 4–5 ppm. Do not add more bacteria every day unless specifically directed by the product manufacturer.
Cloudy water, brown film on rocks, or light algae growth are all normal signs that biological processes are happening. The cycle may appear to “stall,” especially during the nitrite phase—this is normal and often the longest stage. Patience here prevents dead fish later.
Step 5: Confirm the Cycle Is Complete (Don’t Guess)
Your tank is considered fully cycled only when all three conditions are met:
- Ammonia: 0 ppm
- Nitrite: 0 ppm
- Nitrate: Detectable (typically 5–30 ppm)
For extra confidence, perform an ammonia challenge test:
- Add enough ammonia to raise the level to \~1–2 ppm.
- Wait 24 hours.
- If both ammonia and nitrite return to 0 ppm within that time, your biological filter is functioning properly.
At this point, perform a partial water change (20–30%) to reduce nitrate levels before adding any livestock. This creates a cleaner, less stressful environment for your first fish.
If nitrate is present and ammonia/nitrite consistently read zero, congratulations—you’ve built a living biological filter capable of supporting marine life.
Step 6: Add Fish Slowly (This Is Where Most People Mess Up)
Cycling doesn’t end when you add your first fish, it ends when your tank proves it can handle bioload increases without ammonia spikes.
Start with 1–2 hardy fish, then wait at least 1–2 weeks before adding more. Each new fish adds waste, and your bacterial colonies need time to expand to match the increased load.
During this period:
- Feed lightly
- Continue testing ammonia and nitrite
- Watch fish behavior closely
If ammonia or nitrite appears, stop adding livestock and let the system stabilize. Slow stocking prevents crashes, disease outbreaks, and the heartbreak of losing animals that never should have been exposed to unstable conditions in the first place.
Cycling Is an Act of Responsibility, Not Optional Prep Work
Saltwater tank cycling isn’t glamorous, but it’s the most important decision you’ll make as a marine aquarist. Every healthy reef tank, no matter how advanced, rests on the invisible foundation you build during these first few weeks.
When you rush cycling, fish suffer. When you skip testing, tanks crash. When you rely on shortcuts, frustration replaces enjoyment.
But when you cycle your tank properly, you create a stable, resilient ecosystem that can support fish and corals for years. You save money. You avoid unnecessary loss. And most importantly, you respect the animals in your care.
Patience at the beginning is what separates successful reef keepers from those who quit the hobby convinced it’s “too hard.” It isn’t hard but it requires time, restraint, and understanding.
Patience at the beginning is what turns saltwater aquariums from a frustrating experiment into a lifelong passion. Cycle first. Add life later. Your fish depend on it.
Looking for new additions for your tank? Explore our wide selection of beautiful marine life.